
Step 1 : Download the Zip File

Step 2 : Select the 32 bit / 64 bit

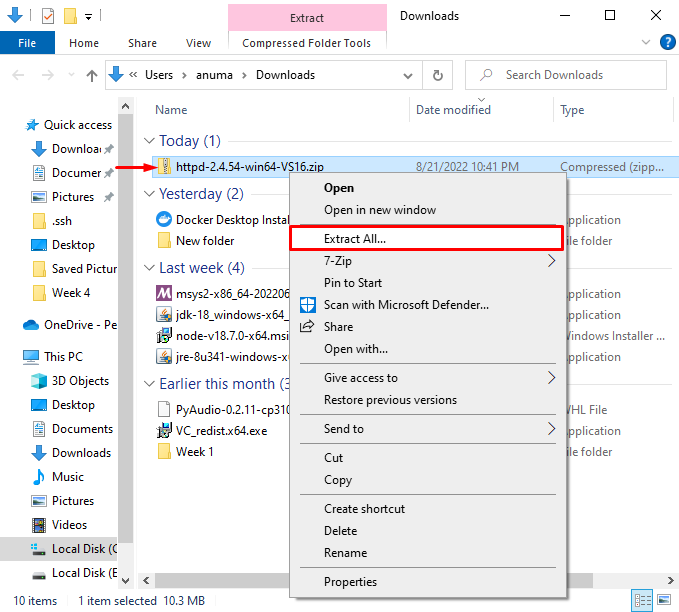
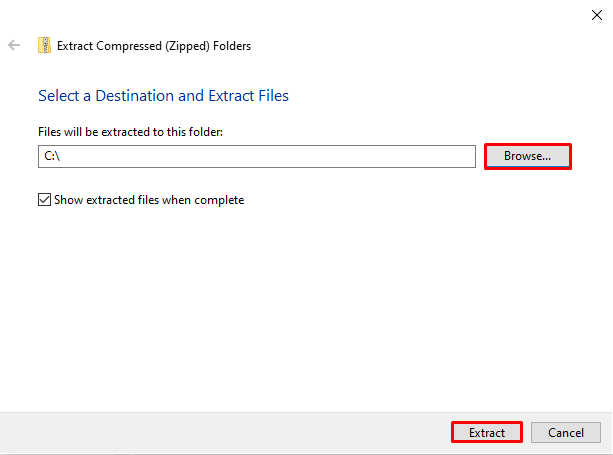
Step 4: Select the Destination file for Extraction
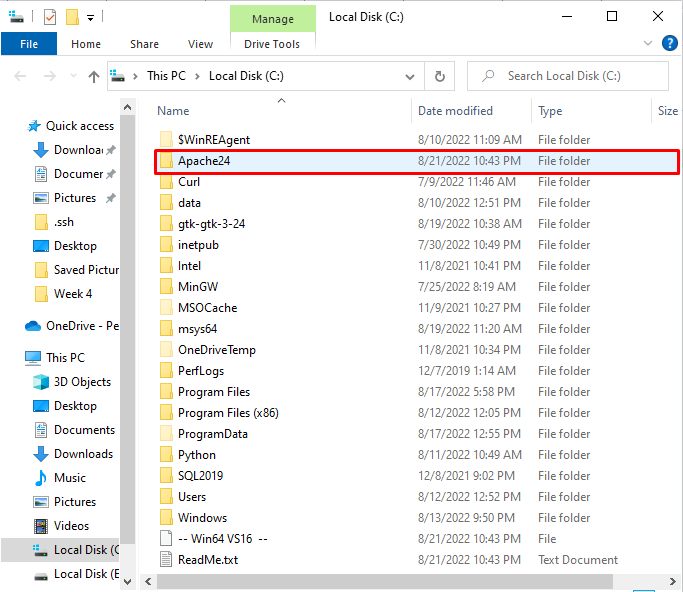
Step 5: Check your Extracted file is in the location or Not
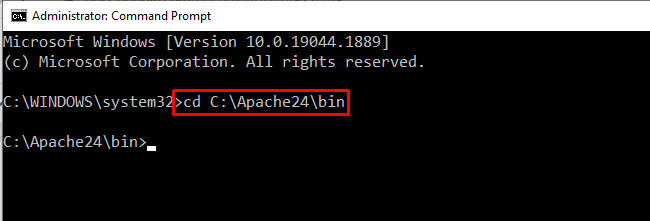
Step 6: Now Copy the Bin path

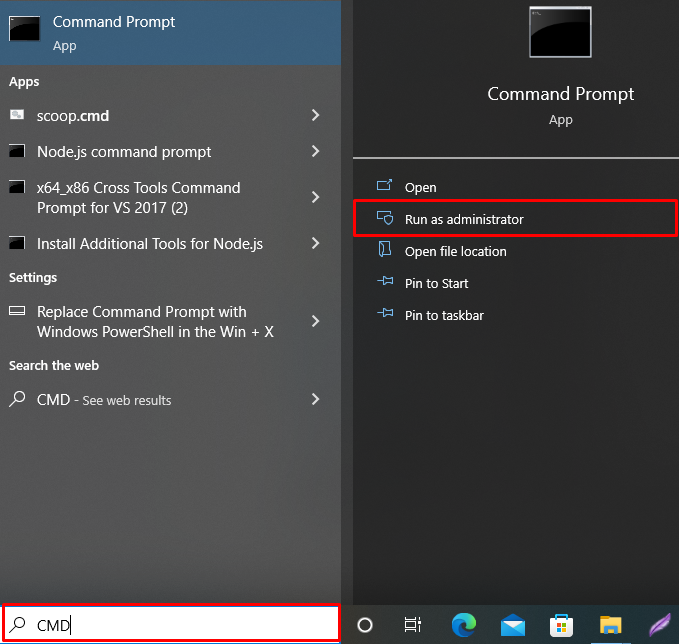
Step 7: Open the Command Prompt
Step 8: type Cd and paste the bin path that you have copied
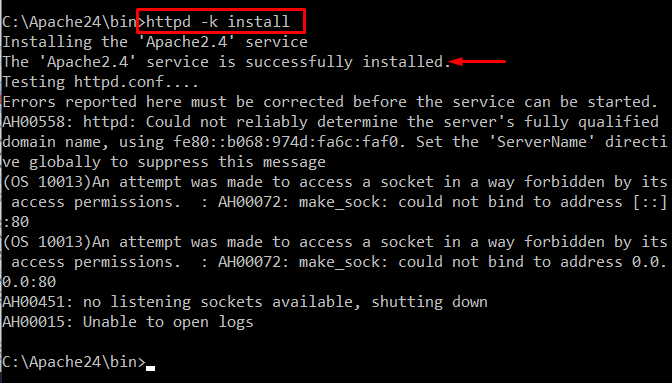
Step 9: Install the Apache server By Typing - httpd -k install
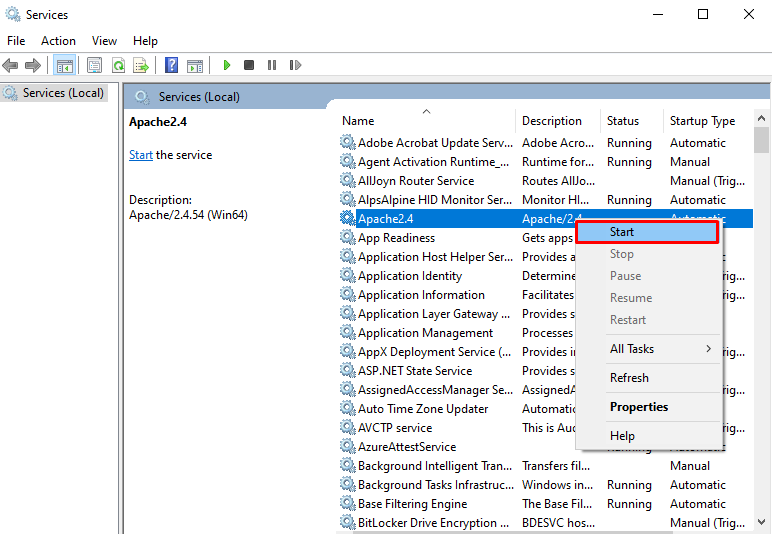
Step 10: Open the Service from the windows

Step 11: Right-click the Apache service and choose “Start” displayed options
Step 12: Apache Server shows Running message when it successful

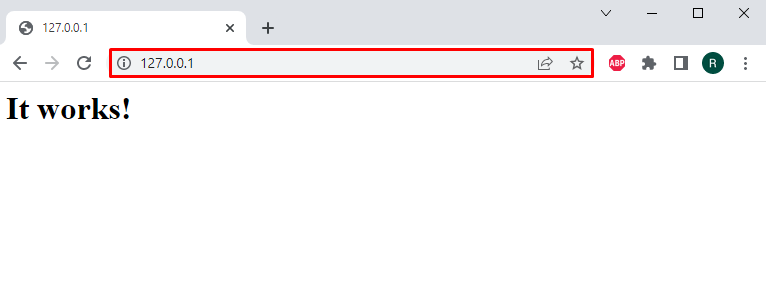
Step 13: Verify your server is installed successfully
use "127.0.0.1" as the local host IP address in the browser. The "index.html" page, which is kept in the htdocs subdirectory, is automatically redirected whenever we try to establish a local host on the server:
Conclusion
Navigate to the Apache website and download the Apache zip setup to install Apache on Windows. Then, use the "httpd -k install" command to install Apache by using the "cd" command in CMD to get to the Apache bin directory. By launching the Apache service and executing it on the local host, you can check the installation. You have learned how to install the Apache web server on Windows from this article.
